
Installing a radon mitigation system in your home should not be overly intimidating, as long as you have some experience with tools and can navigate the makeup of your home. But there are some common mistakes that homeowners have made that we have helped over the years.
So here is a list of seven DIY radon mitigation mistakes and how you to avoid them.

This may seem like a mistake that would be easy to avoid but it happens more than you would think. This can be attributed to being in dark, hot/freezing attics and not thinking or seeing clearly. A clear indication that your fan is installed upside down is that your manometer will be pushing the oil down instead of pulling it up.
To fix this, flip your fan over and reinstall. But to overlook this mistake would mean that you are pumping air under your slab forcing radon into your home thus causing your levels to go much higher.
To avoid this mistake, look for the arrow on your fans label that will point in the direction the air flows.
When attempting a DIY radon mitigation, your goal is to lower the radon levels and comply with code regulations.
One of the most common code violations is installing your radon fan in a living area, such as in a basement. It may seem like a solution to avoid having a fan on the outside of your home. However, if there is a leak above the fan, concentrated radon can be pumped into your home. This is why you always want to have the fan in a nonliving area such as an attic, a garage, or outside.
The following picture incorporates mistakes 1 and 2 because the fan is upside down and in a basement living space.

A manometer plays a crucial role in every radon mitigation system. However, it's often misunderstood and installed wrong. A correctly installed manometer will let you know at a glance that your fan is running and moving the correct amount of air.
To install your manometer correctly, be sure to install it below the fan (see above picture). Make sure to adjust the manometer to zero after screwing it onto the pipe. It's common to have customers call thinking their manometer is broken when it just hasn't been zeroed.
Also, depending on the fan you are using, the suction can be strong. So be careful to not push the tube too deep or it will suck the oil out of the manometer.

For more information on installing and understanding your manometer, please watch the following video.

Another shortcut some homeowners try is terminating their pipe exhaust just above the fan. While it may seem easier, there is good reason to have it exhaust 12 inches above the roofline. When the radon is exhausting right next to the house, it can reenter your home through cracks or a window. To be up to code, a radon exhaust pipe should be 10 feet from any window and 12 inches above the roof line. With the pipe extending 12 inches above the roof, radon can safely disperse into the air.
This exhaust is concentrated radon gas and is dangerous to breathe, so you want to keep it as far away as possible from children and pets.

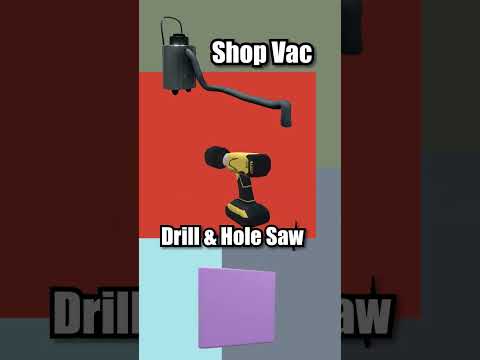
Choosing the right type of pipe has become more difficult due to the rising cost of PVC pipes. However, it's worth the extra investment to opt for schedule 40 over schedule 20, even though it may be more expensive.
Choosing the 40 PVC pipe for your mitigation will result in a stronger pipe that is less likely to break. This is important because you do not want a pipe with high levels of radon to crack. The thicker pipe will also provide better insulation and is a quieter option.
Click here for more information on pipe.
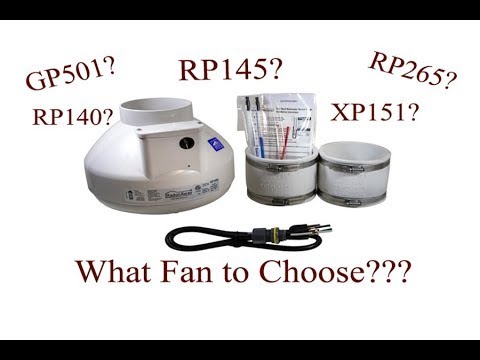
When one goes to buy a radon fan, they are often surprised at how many fans there are to choose from. There is the GP, GX, RP, and XP series to name a few. But which one will work best for your situation?
The importance of choosing the right fan will affect the life of the fan and whether you successfully lower your radon levels. Installing a GP501 on gravel or a RP145 on clay could needlessly burn up a fan or use more power then is necessary. We have often been called into fix a radon mitigation that hasn’t successfully lowered radon levels and find that the reason is that the wrong ran is being used.
There are basically two types of fans, high suction and high flow. If you have clay, dirt, or sand, you most likely need a high suction fan like the GP and GX series fans. If you have gravel or drain tile you will need a high flow fan from the RP and XP series. The XP series also has a smaller profile and looks better for an outside system.
The following YouTube short describes a simple test that you can perform to get an idea of which of two types of fan you will need.
Watch the following video for a description of the different fans and what they are designed for. Click here for more information on radon fans.
One can be positive that they know what's beneath their basement slab. Yet, it’s always best to make your suction pit before ordering your fan. We have done jobs where the homeowner was certain they had dirt or clay under their slab. So we arrive with a high suction fan ready for that kind of system installation. However, after drilling the hole and digging down into the suction pit, we ended up finding a long-lost drain tile that the homeowner was not aware of. For this, we always arrive at every job with fans for all situations and we keep 3” and 4” pipe in the work van for either a high suction or high flow system.
You can avoid this mistake by first figuring out the placement of your suction pit. Pick a spot that is not only good for your pipe run but will also increase your chances of moving air. In most situations, we prefer going along an outside wall. This is not only good because of the settling that can occur along the footings but it's also where drain tile will be located if present.
Once your pit is dug out and you know what soil conditions you have, pick the correct fan for your situation.
The following video gives step by step instructions on how to drill your suction pit in the slab.

By avoiding these seven mistakes you will be able to have a radon mitigation system that is not only effective but it will stand up to the current codes.
If you have have any questions please feel free to reach out and I will be happy to help. Click on the link to our FAQ section and you can fill out a form with your questions.
You can also view our YouTube channel for more instructional videos.
Mar 13, 26 12:12 PM
Dec 21, 25 04:24 PM
Nov 24, 25 11:11 PM
By Val Riedman Copyright © 2007-2025 Indoor-Air-Health-Advisor.com
Build Your Own Website with Solo Build It!
