by Curt
(Britt, Hancock, Iowa)

Starting point
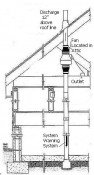
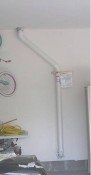
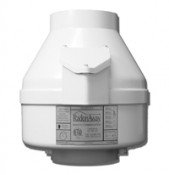
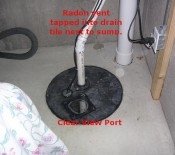
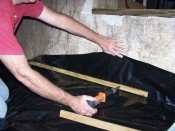
I own a 1966 ranch house in Northern Iowa. Finally decided it was time to wrap my arms around the health hazard of Radon. Did a First Alert test to see where we started and it was 21.1 pCi/L. As the sump pit in my house was simply a clay tile in the floor where the under ground tile dumped into I knew I was going to need to replace that first. For this work I hired it done because I do not have the tools to do this. Removed old pit and due to under the floor sewer lines it had to be relocated a few feet. Buried a large plastic sump pit and dumped all the tile into it and threw a flat lid on it. Next steps for me were to purchase all of the components to vent the radon and I used Val and his expertise. Bought a dome and a fan kit and parts to undertake this on my own. The hardest part really was finding a good route out of the house due to my sump being on the front side of the house and my desire to have the fan on the back side of the house. Figured that out and went to work on the install. It turned out well, I am pulling 3.5 in wc with my fan. Did a new short term test and it showed <0.5 pCi/L so then I did a three month test with Accustar and that came back right at 3.0 pCi/L which is below the requirements. I saved money using this site and doing most of the work myself. I had a quote of about $4,000 to do this project from a Radon Company.
Design Pages |
Mar 13, 26 12:12 PM
Dec 21, 25 04:24 PM
Nov 24, 25 11:11 PM
By Val Riedman Copyright © 2007-2025 Indoor-Air-Health-Advisor.com
Build Your Own Website with Solo Build It!